Enabling SSO in Luzmo with Okta
This guide will walk you through the steps to enable Single Sign-On (SSO) in Luzmo using Okta as your Identity Provider (IdP).
✅ This setup requires access to Luzmo's SSO Settings (available to Organization Owner).
1. Access SSO Settings in Luzmo
Go to Luzmo App
Navigate to:
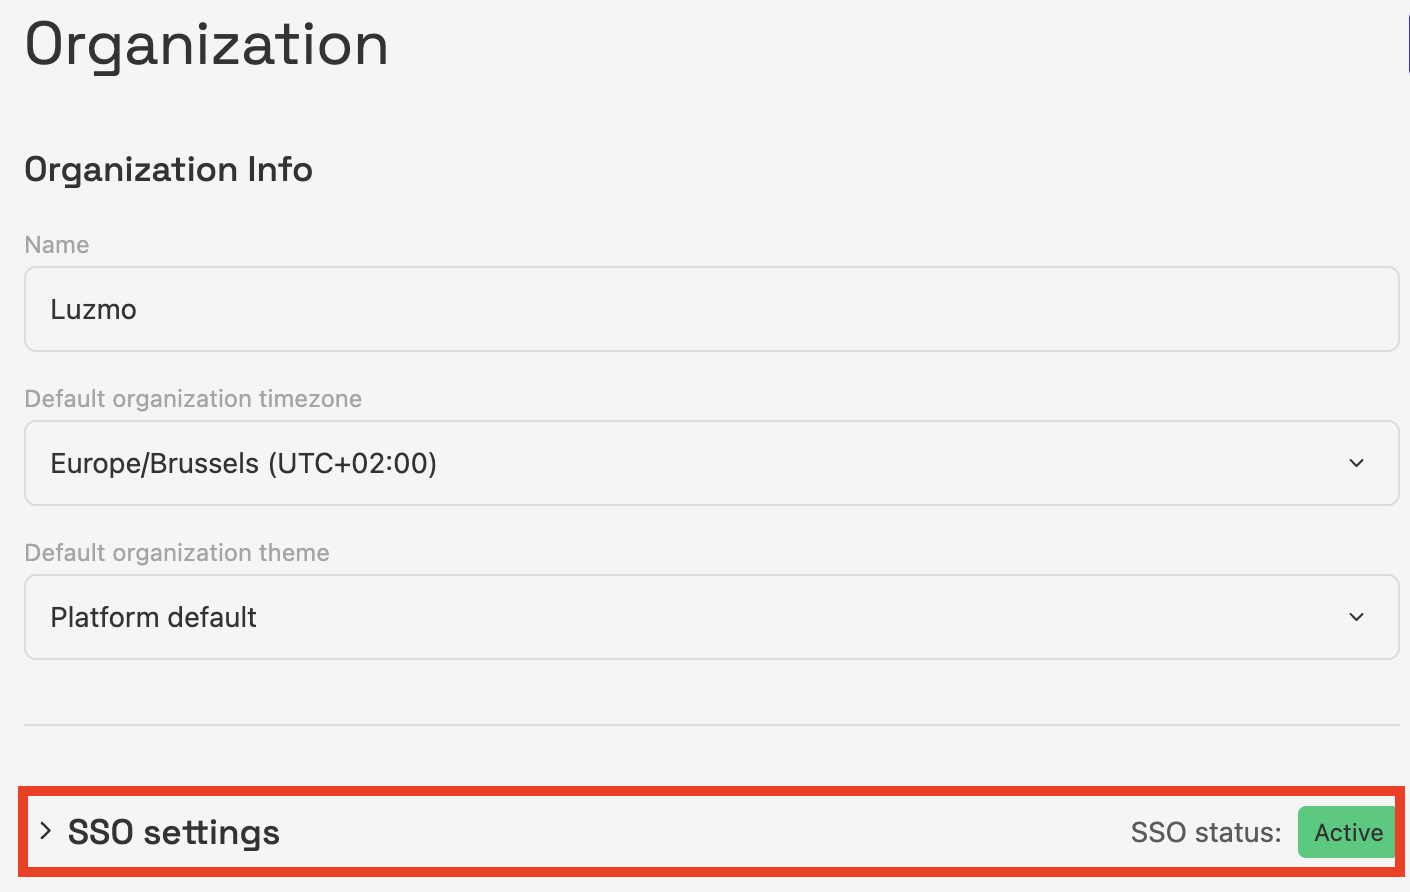
Settings→OrganizationLocate the SSO Settings section (collapsed by default).
Click Expand to open the configuration panel.

2. Create a New Application in Okta
In your Okta Admin Console, follow these steps:
➤ Create a new App Integration
Application name:
LuzmoApplication type:
WebSign-in redirect URIs:
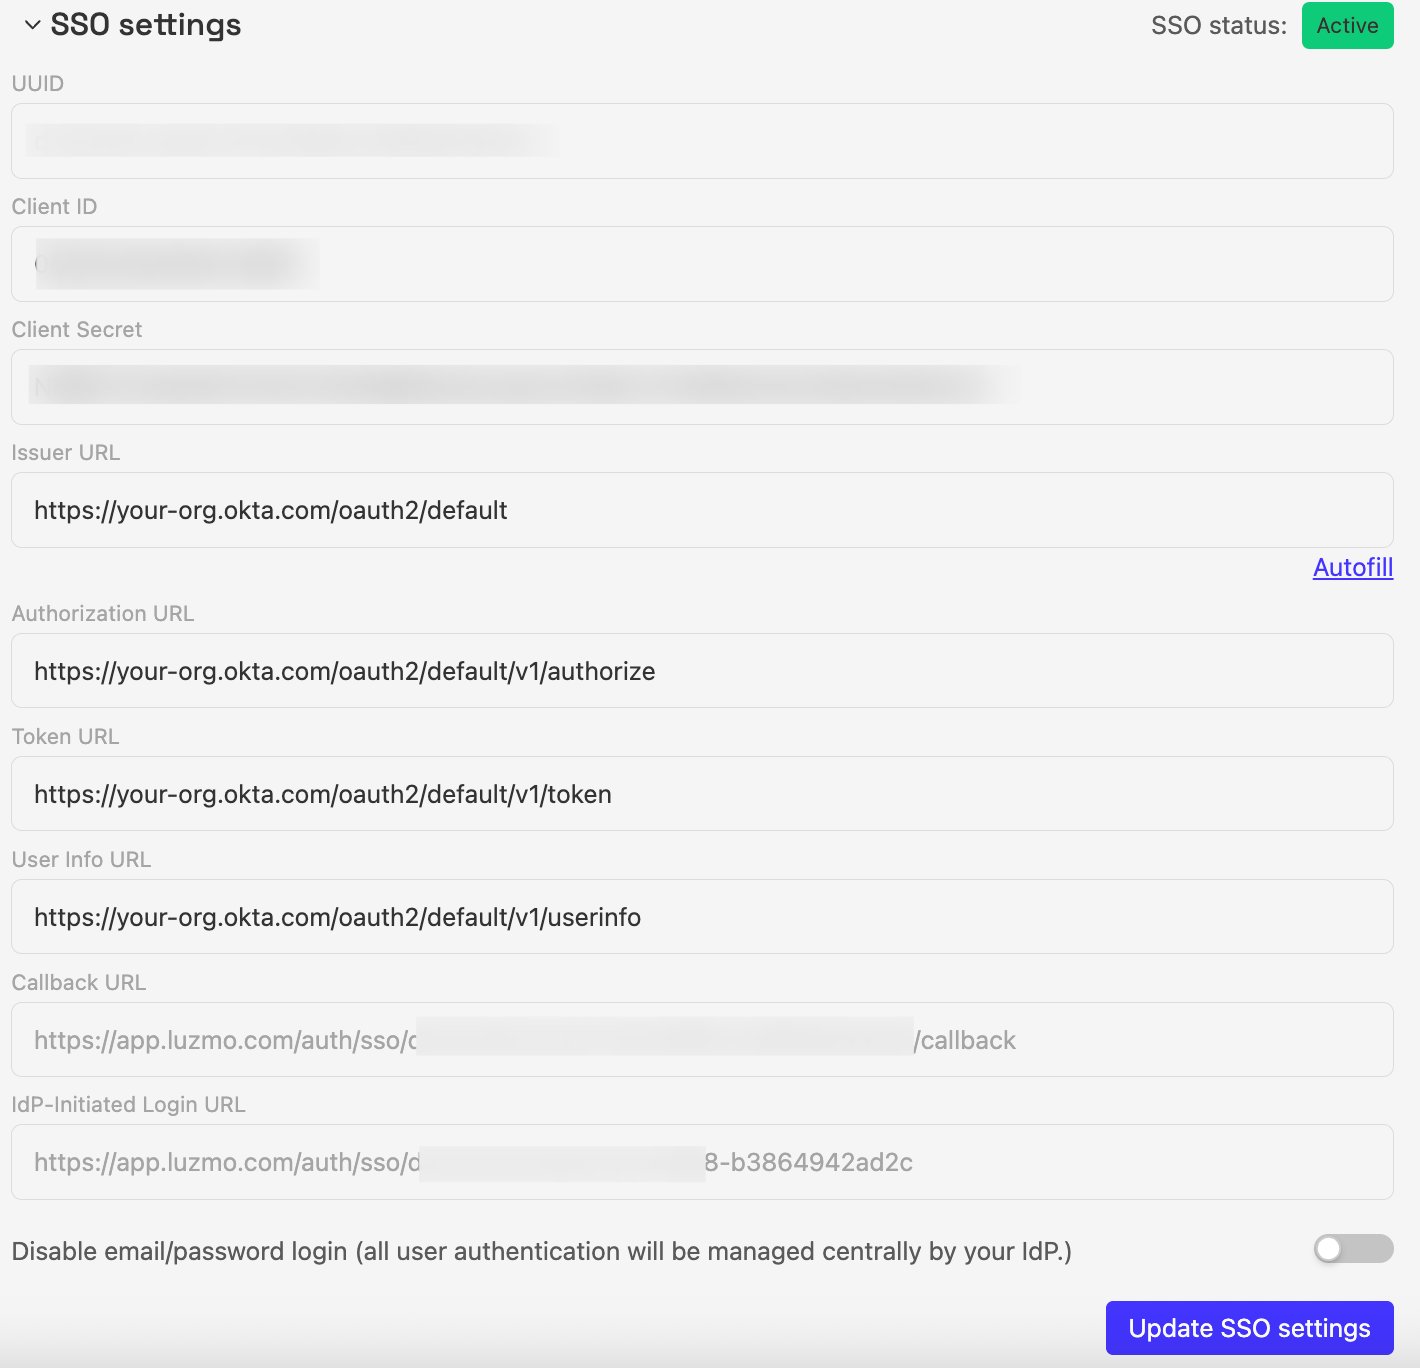
Use the Callback URL shown in Luzmo’s SSO Settings
Initiate login URI:
Use the IdP-Initiated Login URL from Luzmo’s SSO Settings
These values are specific to your organization and automatically pre-filled in Luzmo.
3. Complete the SSO Configuration in Luzmo
Back in Luzmo, under SSO Settings, provide the following:
| Field | Description |
|---|---|
| Client ID | Copy from your Okta application |
| Client Secret | Copy from your Okta application |
| Issuer URL | find or create your Issuer URL in Okta Admin console: security → api → Issuer URI |
Once you enter the Issuer URL:
- Click Autofill to automatically populate the remaining required URLs:
- Authorization URL
- Token URL
- User Info URL
Then click Update SSO Settings to save.

4. Add Users to Luzmo
For users to authenticate via SSO, their account must exist in Luzmo.
You can create user accounts:
- Via the Luzmo UI:
- Go to
Settings→Organization - Scroll down and click Add Member
- Go to
- Or via API:
Use our
createUserendpoint:
5. User Login via SSO
Once SSO is configured:
- Users go to: https://app.luzmo.com/home/login
- Click Sign in with SSO
- Enter their email
- Luzmo will redirect them to Okta for authentication
After successful login via Okta, they are redirected back and logged into Luzmo.