How do I whitelabel my Luzmo environment?
Whitelabeling is a powerful feature in Luzmo, which allows you to add your own logo and branding to the Luzmo dashboard editor. In that way, you can adapt our powerful dashboard editor to completely fit the look & feel of your brand, and offer it as an additional service or feature to your own end-clients.
Note: to have access to whitelabeling, you’ll need an Elite or Enterprise plan. If you’re on a different plan, but still interested to try out whitelabeling, simply get in touch to discuss the possibilities.
Which items can I whitelabel in Luzmo?
There are a number of things you can adapt in the Luzmo dashboard editor in order to whitelabel it. Here’s an overview of all the items you can change:
- Replace the logo with your own logo
- Change the main color and accent color of the platform
- Change the background image of the login screen
- Add your branding to scheduled emails
Please see the video and the details below for a look at how to adapt each of these items.
1. Changing the logo
Simply navigate to the ‘Profile’ section. Below ‘Profile Details’, go to the tab ‘Whitelabeling’.
You’ll find all the whitelabeling options in this tab, starting with the logo. Simply click on the ‘Add logo’ button and upload your logo.
Pro tip: use a graphic logo that works well on a white background. For the most optimal result, upload an image that’s 256px square or larger.
2. Changing the colors
In the same tab, go to the ‘Colors’ section and simply select your main color & accent color. The two colors will be used in combination, so make sure you choose colors that work well together & are visually different. You can also reset the colors back to the default option.
3. Changing the login background
In the same tab, you’ll find a section named ‘Login background’, where you can upload a new background image for the login screen. Below, you can see an example of what the login screen would look like.
Pro tip: use visual images rather than text-heavy images, and upload an image that’s more than 1024px wide for an optimal result.
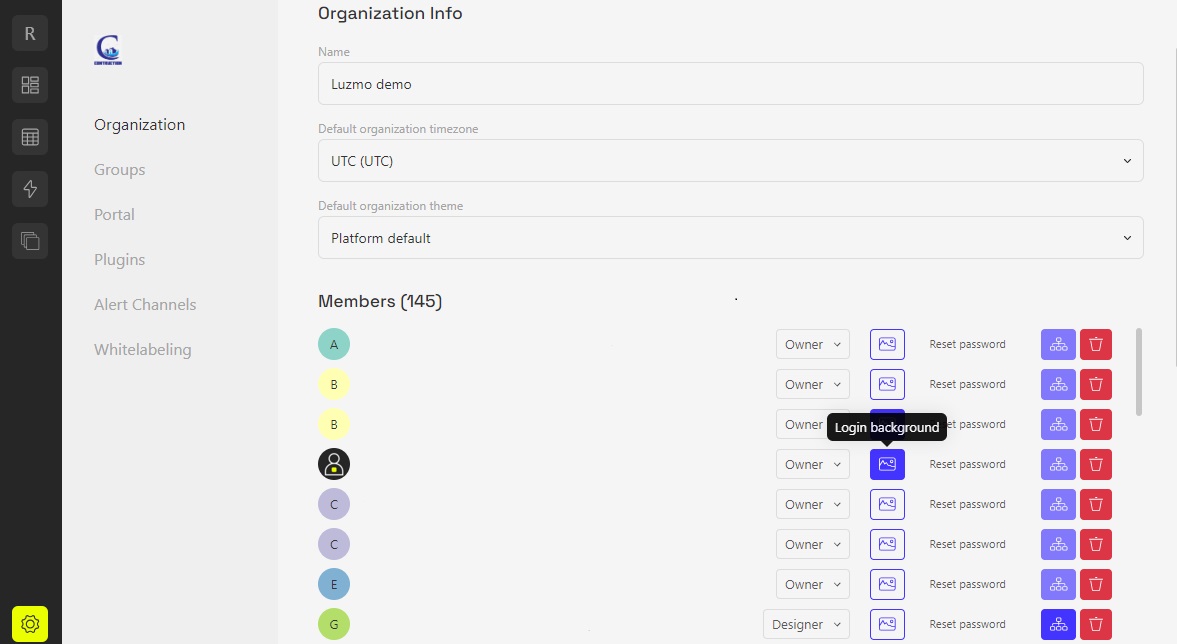
If you want to go really advanced on personalization, you can even set up a different background image for each member in your organization. Simply navigate to the 'Organization' section in your profile and you'll see a small image icon behind each member of your organization. Click on it, upload your background image, and repeat for every organization member you want to give a customized login screen. It's a great way to personalize the experience, you could for example surprise your colleagues or customers on their birthday! ;-)

4. Changing the scheduled emails
In Luzmo, you have the option to create an automated mailing schedule which will email the updated dashboards in PNG or PDF format to the email addresses you have specified.
With whitelabeling enabled, these emails will be branded with your colors and logo, which you specified above. In addition, you can also customize the email sender: simply adjust the email address and display name in the ‘Emails’ section of your ‘White-labeling’ tab. The result will look like this:
Important! To make sure emails don't end up in spam, it's important to whitelist your configured 'From' address. You might also need to adapt your SPF and/or DMARC configuration to allow emails to be sent from your domain via our mailing provider. We've created the SPF record "spf.luzmo.com" that you can reference in your SPF record for that purpose. For more configuration information, see this article.
If you want to customize the message in your email, you can do this when setting up the email schedule. For more information on how to set up a scheduled email campaign, check out this article.
Are you eager to try out whitelabeling? Head over to the dashboard editor and get started, or reach out to us and we’re happy to help you get started!